Saturday, October 6, 2012

Ode to my lamp


OK, I confess, it's not really an ode. I can't really even remember what an ode is: I learnt about it in my first year at university, and like most information learnt for exams, promptly forgot. But it is a post about my lamp!


To make:

You need:

A lamp
Enough fabric to cover the shade
Pom poms on a string (I got mine from John Lewis)
Ribbon
LOTS of glue


Wrap the fabric around the shade, and cut to size. You might find it helpful to hold it in place with a hair clip!

 Glue one of the ends of the fabric to the base, and wrap the fabric around. Fold the remaining end under to neaten, and glue.


 Glue the edges onto the inside of the shade, rolling them other to hide the loose edges.

 Glue on the pom pom string.

I decided to glue on added ribbons to hide the base. Just cut the to the desired length, and glue. You might need to layer them, depending on how angled it is. Hide the raw edges at the top by wrapping a piece of ribbon around it, an voila!


S


Tuesday, September 18, 2012

On collars (again)

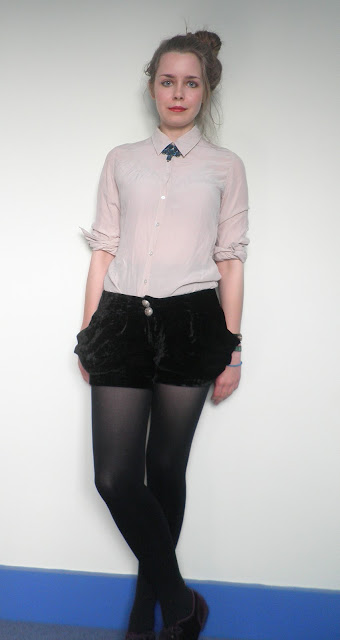
Further to the joys of spangly collars, one can make use of the current trend of buttoned-up shirts, and have a sparkly neckline by wearing a short necklace under the collar, so it pokes through at the front. Which is easier than beading your collars, and cheaper than buying them pre-beaded!


I did this once when working in a rather snooty clothing concession in a department store, but apparently this was 'too formal'. Yet this was the kind of place which stocked those feathery things people pop on their heads to go to the races,  and 'mother of the bride' dresses. Go figure. Any ho, due to the aforementioned trend of buttoned-up shirts, used judiciously one shouldn't look too overdressed with a bit of short-necklace-under-collar action!


Thursday, September 6, 2012

On Collars

 Sparkly collars seem to be everywhere at the moment. Maybe I have fashion-foretelling powers, because I had a go last Christmas when I had itchy fingers and nothing to do! 
Top tip: make sure you sew the beads on the right side of the collar, lest you should have to unpick a collar's worth of beads, like I did!

To Make:

Sew long beads on to the collar using a back stitch: Sew the first bead on, then sew through it again, this time threading another bead on to the thread, and sew it down. This should help to keep them in a straight line. I uses black thread for the long beads, and gold thread for the small ones.


Tuesday, August 28, 2012


I don't quite know how to start this, maybe a trite sentence about first steps, and how this particular step is clad in sparkly leggings? Any-how, it's been started regardless! This is just a little blog about crafty and fashiony  things ('fashiony' should really be a word), so I'd better get started:

Armour Leggings

These have been inspired by armour, although in a very stylised manner!   
I thought I would try embroidering on a fine mesh, and then sewing it on to the leggings, as opposed to embroidering straight on to them. I got the idea by seeing that makers pretty embroidered leggings extraordinaire, Beberoque, often use it, and I think I would recommend it. Embroidering on to mesh is far easier since the large holes make it easier to do evenly spaced stitches.


S
xxx